
My New Craft Cabinet!
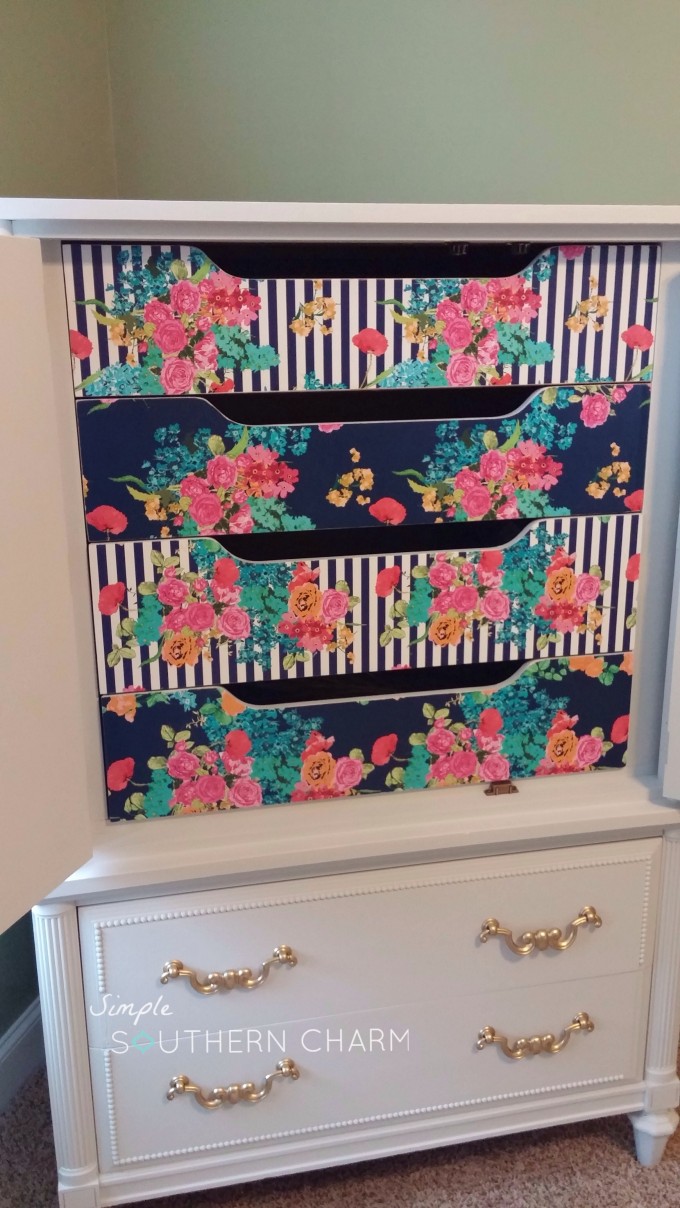
I’m so excited to share my new craft cabinet with you! It was part of a vintage Thomasville bedroom set that my mom bought on Craigslist and lucky for me, she didn’t need this particular piece. It’s taken a while, but I’ve FINALLY relocated the kids playroom up to the third floor, reclaimed the room and decided this would be the first piece of furniture to make it’s way into MY new studio space! As you can see, it’s missing some detail, but I’ve got replacement trim on order.

In it’s current state, it’s a little boring, but the drawers are huge and there’s plenty of space for all my goodies. Overall. This baby had great bones.

I began by cleaning and lightly sanding with 220 grit sandpaper. I painted ‘er up in Lamp White by Fusion Mineral Paint. This is a fairly new line, but is put out by the same company who manufactures Miss Mustard Seed Milk Paint. The best part about it! No too coat required!! Anywho, I was undecided about detailing the trim in gold. My sweet hubby thought it made the piece look dated. I figured I’d listen to him for once 🙂

…and back to white the trim went.

I did manage to work in a little bling with the drawer pulls. Originally I’d planned to spray the pulls white, but truth be told, the spray paint malfunctioned and so gold it was. I loved the look, but the top and bottom knobs were looking a little disconnected. I decided to add gold tint from Fusion’s tinting kit behind the cabinet knobs and now it looks like it was all meant to be! And how about those knobs!? Aren’t they gorgeous!? I bought them almost a year ago from Anthropologie and was just waiting patiently for the perfect piece to use them on.

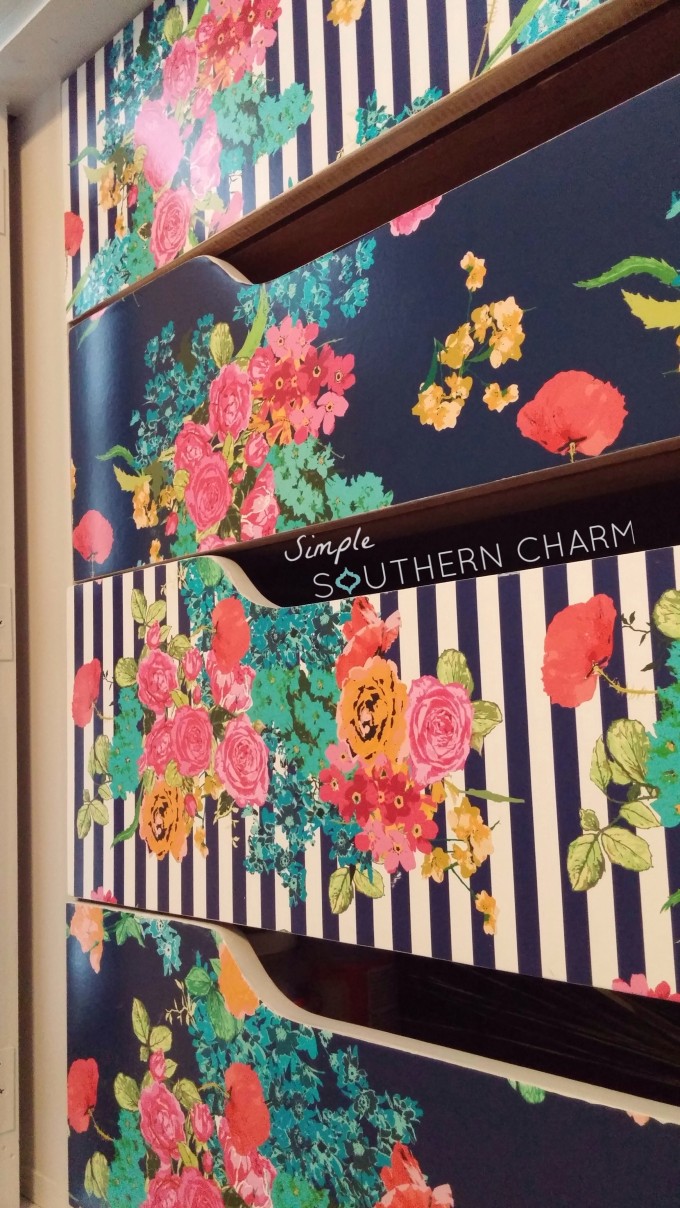
This paper, ohhhh this paper! This was another purchase that happened months ago with absolutely no plan in mind. I saw it, loved it and bought it. I’m so happy that I get to see it every day! If you need an amazing paper source, you MUST check out Spoonflower! The selection is amazing and I <3 that they're local. I hapoened to order this paper in a gloss finish so I didn't too coat it. I used my trusty old mod podge to adhere it, worked out all the bubbles and was able to achieve a smooth flawless drawer front. I've recieved a number of questions regarding cutting the paper to size. Believe it or not, I cut the paper into a rectangle, attached it and let dry and then used my palm sander to ensure an exact fit! Easy peasey!
I'd love to hear your thoughts, so please make sure to leave me a comment. As always, if you have any questions, ask away! Please feel free to PIN and share too!


That cabinet is wonderful! I am thinking to do something similar but I hadn’t thought of adding paper to the drawers and I adore the paper you chose! Do you remember where you bought it?
Love what you did and lots of storage is a plus…Merry Christmas:)
This is so cool! Love flowery pattern 🙂
xx
Mila
Thanks a bunch! xo
LOVE LOVE LOVE the cabinet. Great paper that makes you happy. You did an amazing job of reinventing the cabinet.
Thanks so much! I can’t wait to tackle another one! xo
I love this so much! The pop of pattern on the inside is too fun!
Thanks! I’d been hoarding the paper forever, lol. I’m thinkin I may may a few cute picture to hang with the rest. xo
Hi There!
A new reader from No. California…..
Beautiful job on this lady!! The splash of color when you open the door must be so invigorating. Really nice work.
God Bless your New Year,
Colleen
Hi Colleen! Happy New Year! Thanks so much. The drawers are absolutely my favorite part of this piece. It’s super simple on the outside, but the surprise pop of femininity is right up my alley! Glad you like it. 🙂 xo
Stunning! I LOVE it!